Maximite Computer
A homebrew computer by Geoff Graham
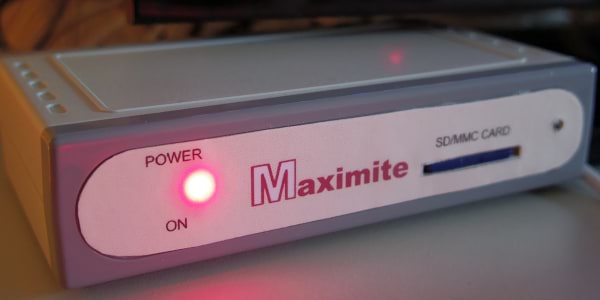
I've long been fascinated by the early days of home computing. The years between the early 70's and mid 80's are one of my favourite periods of computer history to read about. During this time, a dizzying number of unique and wildly different machines were released to an increasingly eager general public. The industry ballooned and new computers were coming to market on an almost monthly basis. Such a rapid expansion in home computing must have been a pretty exciting thing to witness!
The early part of this era was dominated by the very first kit computers. Thanks to the space race, a proliferation of relatively cheap IC chips made the first home computers a real possibility. These simple computers typically shipped unassembled and had to be soldered together by the user. Most had limited displays (or no real display at all) and instructions could only be input into the computer via an array of toggle switches or buttons. If you wanted to hook your computer up to a TV, add a keyboard, add a Basic ROM chip or a means to save data, or even a case to house everything in, all of these things had to be added by the user with aftermarket parts. Newsletters and early user groups quickly built up around some of the more popular machines to better share ways to get to most out of these new technological marvels (the most famous of these being the legendary Homebrew Computer Club, where the Apple 1 computer made its debut). Needless to say, such kits had limited mass appeal and were aimed squarely at dedicated electronics enthusiasts. Mainstream uptake on the idea was slow at first.
But tech was rapidly progressing and shortly following the hobbyist era came an ever greater number of ready built mass market computers. These were aimed more at the professional classes, educational establishments and the children of well to do families. Consumers who wanted the technology to (mostly) get out of the way, to be able to do business related productivity tasks or help the next generation get ahead in this brave new world. Some machines, like Sinclair's ZX80/81 aimed to be a bridge between both worlds, offering consumer grade home computers in both ready assembled and DIY kit forms.
So what does all of this have to do with the Maximite? Well, a few years ago I decided I wanted to experience building a kit computer just like the early computer hobbyists of old. These days, there are actually quite a few options available for anyone who wants to do the same (though I didn't know about many of them at the time). For example, you could build a modern replica of a well known old computer. You could build the Altair-Duino and µKENBAK-1 kits available at Add Water & Stir (replicating the Altair 8800 and Kenbak-1 respectively). Or you could build a PDP minicomputer with the PiDP-8 and PiDP-11 kits available from Obsolescence Guaranteed. Kits for the COSMAC Elf exist, as do kits to build modern versions of the Sinclair ZX80 and ZX Spectrum computers. I have little doubt other similar kits exist, I just don't know about them. But if you're interested, Tindie is a good place to start looking.

In the end, I settled on building a monochrome Maximite. This is a PIC32 based homebrew computer designed by Australian Geoff Graham. There were two reasons why I chose the Maximite over the others. Firstly, with the exception of the PCB and pre-programmed PIC chip, it uses cheap and easy to find off-the-shelf components. This means that pretty much anyone can build it provided they can source the parts. Most of the computer kits I mentioned above are high grade, fairly accurate replicas with a price tag to match (though still much cheaper than owning the original computers). And secondly, I like that it's doing its own thing. It's not a replica of an existing computer, but a unique machine that seeks to modernise the concept of a classic 80's home micro.
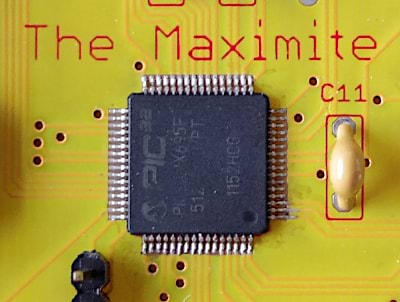 Building it was pretty easy and stress free, only taking me a couple of hours. I have decent soldering skills when it comes to putting things together. The biggest challenge is soldering the chip to the board. If anything is going to go wrong, it's likely to be this. That I was able to do so is nothing short of a miracle because the chip is absolutely tiny. It's really no bigger than a fingernail. There are guides available out there for soldering SMD chips this small, so if you are crazy enough to give this a try, I suggest you at least watch those first to see if you feel up to it. It's also possible to hone your skills using SMD practice kits bought from ebay.
Look below to see the rest of the computer's guts. As I said before, the beating heart of this thing is pretty much that little chip right in the centre of the board. Everything else consists of input/output ports, various passive components, power regulation and an SD card slot for storage purposes.
Almost every component you can see here cost pennies. Only a few components cost more, like the various ports and what not. The most expensive component by far was the PIC32. Unprogrammed chips are usually cheaper, but unless you have the means and know-how to program the chip yourself, you'll want to buy a pre-programmed chip like I did. This is by far the most expensive part of the computer, with a current price of around £18. This makes sense of course. It
is
the computer after all. The pre-programmed PIC chip and PCB were purchased from the same Netherlands based online electronics website Budgetronics. At the time of writing, both are still in stock. While they do ship to a handful of countries outside Europe, depending on where you live, you may wish to find a supplier closer to home. While it isn't strictly necessary, I even went as far as to source the original enclosure from ebay (possibly even from the very factory it was made) because I couldn't find a suitable alternative housing for it. I think when it was all costed up, it cost me about £45-£55 to build. For comparison, the current cost of the later and more advanced Colour Maximite kit is around £70 (More expensive, but also more powerful and at least you won't need to solder any tiny SMD chips!).
You can see that I haven't completely populated my board. Missing is a power switch. Here in the UK we have on/off switches at our power outlets anyway, but I know that's not always the case elsewhere.
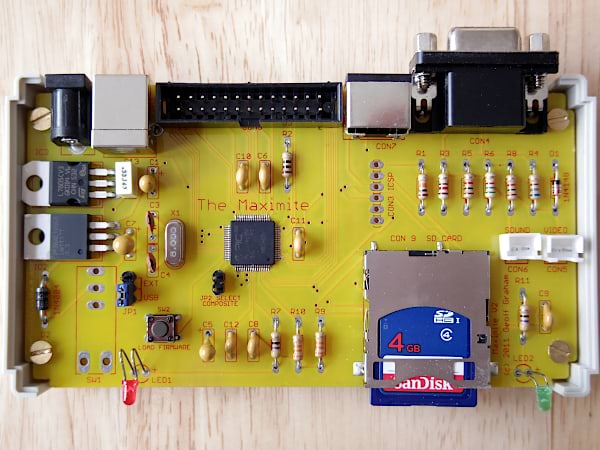
Below you can see that I've cut a rather untidy looking hole for the various input and output ports. From left to right, you can see a VGA port for video out (480x432 pixels). An old style PS/2 port to attach a keyboard. A connector for 20 I/O lines (similar to a Raspberry Pi GPIO. I couldn't find an angled one as specified in the parts list). A USB type B connector for Serial data (this can also supply power and there's a jumper on the PCB to select for this. As you can see, I power my computer this way). Finally, there's a barrel socket for a 9V DC supply. Two connectors on the PCB make it possible to add composite out and a piezo electric speaker but I've yet to do so.

So what can you do with a Maximite computer? Well, you could of course use it as the creator intended to write Basic programs using the built in MMBasic interpreter. MMBasic is also the work of Geoff Graham and is (for the most part) backwards compatible with Microsoft's own MBasic. Thanks to the SD card slot, saving and transferring programs is easy and reliable.
To my surprise, I found that a large number of early Basic programs can also be run on the machine, such as those found in the classic programming book "Basic Computer Games" by David H Ahl. As long as the program in question doesn't use any computer specific graphics commands, any .BAS file you can find has a high chance of running on the Maximite (in other words, programs written for multiple platforms or for earlier computers without graphics modes should work pretty well). However, it should be noted that the Maximite does have its own set of graphical / sprite commands to better aid game creation. Of course, the Maximite is blazing fast compared to a typical 80's home micro, so many old programs will need to be modified to run properly. Some listings I found in an old Usborne computer book (see links below) flashed characters on screen so quickly that it was impossible to read them! I guess you could also go looking for Basic listings in digitized 70's and 80's computer magazines and books. Lots of these can be found in the Internet Archive. It might be fun to see if you can update or translate the code to MMBasic.
If you want to see what other users have done with their computers, you can peruse the official MMBasic Library. There are a couple of useful and interesting programs here, like a file manager and a program for rendering bitmap images on screen (which is pretty hit and miss and takes a loooong time to render). A handful of games for the computer also exist, though some would crash on my Monochrome Maximite and had to be altered a little before they would work (typically by changing or removing a line of code here or there). One day, when I'm a neocities supporter, I'll share some of these programs in a Zip file.
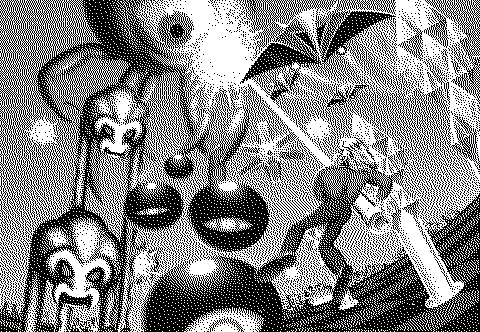
Space Harrier artwork successfully converted to the Maximite picture format. This is essentially just a 1-bit bitmap image (converted here to PNG for uploading to neocities)
To be honest, I haven't done a great deal of programming with my computer. I'm not much of a programmer and I find the MMBasic manual to be full of bewildering and arcane instructions far beyond my basic understanding (pun intended). Maybe it would be better to start with a more beginner friendly book on the Microsoft Basic languages, eventually working your way up to the user manual.
So what do I actually do with my Maximite? Well, I found a guide
(Waybackmachine link)
that lets you replace the Maximite firmware to allow you to install RetroBSD (a UNIX OS based on 2.11 BSD, ported to the computer by Serge Vakulenko). As of writing, the RetroBSD website is no longer live and the files it hosted are gone too. The URL just redirects to the developer's Website. The files may still be there for all I know, but I don't know a word of Russian. I guess he moved on to other things?
Anyway, in this way we can replicate a University computer lab of the 1980's, with the Maximite taking the place of a PDP-11 and a terminal emulation program (connected via USB) taking the place of a real terminal like the VT100. Unlike in the guide, I use Minicom instead of PuTTy to talk to the Maximite and it works just fine. By the way, the computer can easily be converted back to its original MMBasic interpreter firmware if desired.
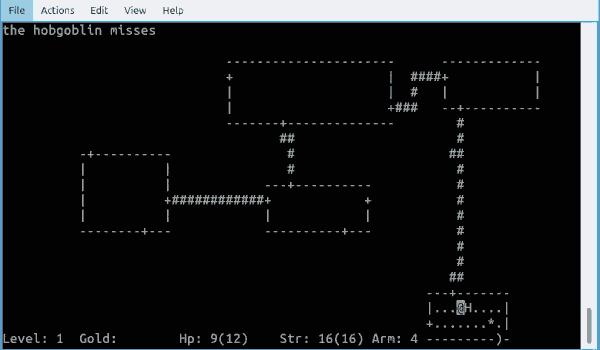
A battle to the death with a hobgoblin. The Maximite sits under my monitor, ready for when I want to log in to Unix to play a quick game of Rogue or hangman. It goes without saying, but there are much easier ways to go about playing these old Unix games.
The Maximite may not be as popular as the Raspberry Pi, but if you don't fancy the trouble of building a computer of your own, there are still a number of companies offering ready built Maximite compatible computers out there. Or alternatively, you could give the MMBasic programming language a go in MS DOS.
Do I recommend building this specific Maximite model? Not particularly. After all, it's several generations old now and very few people are still writing programs for it. With the much more capable Colour and Colour 2 machines now available to tinker around with, it's been largely superseded. Nevertheless, I still had a great deal of fun building, experimenting and playing around with this little computer, so from my point of view it's served its purpose well.
Further Information:
Official MMBasic Website
The 8-Bit Guy Colour Maximite video review
The Backshed: A forum frequented by Maximite users
Geoff Graham's website
Usborne 80's computer books