+--+--+--+--+--+--+--+--+--+--+--+--+--+--+

Anytime I go on days out with family and friends, I typically pick up a few elongated pennies as a momento of my trip. I'm sure almost everybody has at least a few of these things. Luckily for me, where I live in the North West of England is a bit of a mecca for squished penny collectors, as there are so many of these penny mangles around. As a result, I have quite a few of these now, but where's the best place to store them?
It seems like most collectors store them in custom made folders but I think that's a little bit ordinary. So I had the idea of collecting them in a little treasure chest, inspired by the way pop culture pirates hoard their booty. I'd been searching for a cool looking mini pirate chest for ages but nothing seemed to take my fancy, so I decided to buy a cheap wooden chest (the kind you find in craft shops) and try decorating one for myself. The whole project cost me only £2.19, mostly because I had almost everything I needed already. If you have basic craft supplies and some common household items, it shouldn't cost you much more than that, either.
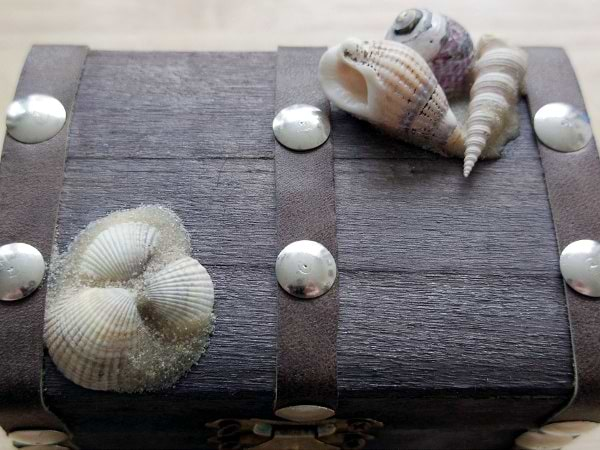
A view of the lid and shell arrangements
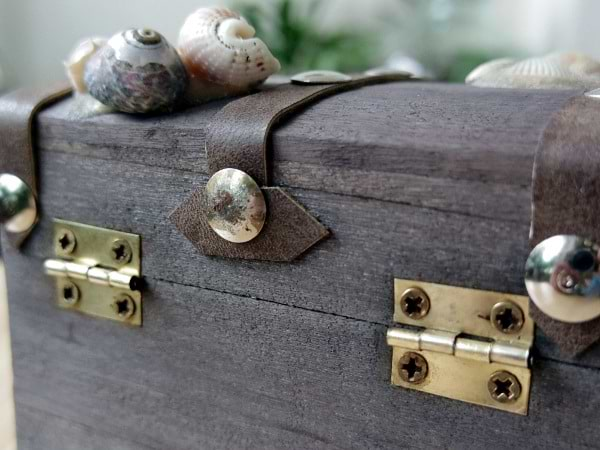
A look at the back
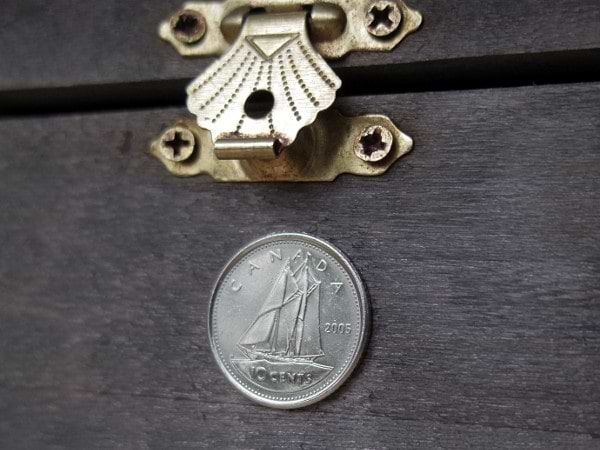
Canadian dime close-up
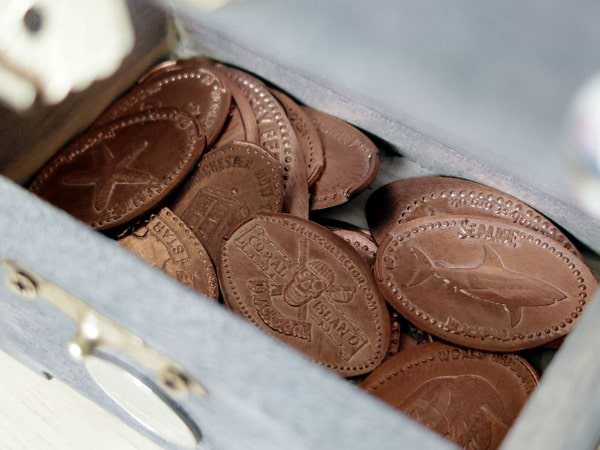
What's inside? Treasure of course!
- Plain wooden chest (probably pine) - £1.50
- tea bags
- vinegar
- rusty old screws and nails (or steel wool)
- drawing pins / thumb tacks / whatever you call them where you live… (cost 69 pence)
- PVA glue
- Some seashells
- A Canadian Dime
- Aquarium sand
- Scrap PU leather (from a broken old bag)
- Sharp knife, metal ruler and cutting board
- A brush
Guide
Step 1 – Make your own woodstain
For this, you'll need some vinegar and steel wool (but it can also work with rusty nails and screws, which is what I used). A more detailed guide for making this stuff can be found here, but basically you take the steel wool, put it in a jar with vinegar and wait for it to react into something called "Iron Acetate". You'll use this to deepen the tannins in the wood to create a stained look. For a project this size, you won't need to make much. Leave it for a few hours to brew.
Step 2 – Make some tannins
Because pine has very few tannins in it, you'll need to add some tannins to the wood yourself. This is pretty easy to do. Put a tea bag in a mug and add a small amount of boiling water (this will help concentrate the tannins). Let it brew for a few minutes and then start applying it to your treasure chest with a brush. You might want to apply a few coats.
Well, This is what you SHOULD do. Unfortunately, this isn't what I did. I submerged the whole thing in a big bowl of hot tea, which turned out to be a big mistake, because it warped the wood and leeched all the glue out of the joints. It's a miracle my little treasure chest is still holding together, to be honest (Uh... let's just pretend I was trying to simulate saltwater damage... OK?) So yeah, don't do that.
Step 3 – Apply your woodstain
So now you're ready to stain the wood. Apply a coat of the iron acetate and let it dry. WAIT before applying another coat, the tannins will keep reacting with the iron acetate even after it dries. When you are satisfied the wood won't darken any further, you can add another coat if you wish.
Step 4 – Leather decoration
Take your PU (fake) leather material and cut it into strips of the right size for your chest. You want them to be about as wide as the drawing pins that you'll be using. When you are sure they fit well, apply a thin layer of PVA glue to back of the strips and glue them to the chest (The PVA is just to hold them in place for the next step). When the glue has set, start pushing the pins into place to secure the leather further to the chest (it's up to you where you put these. Look at other treasure chest images for inspiration). It's soft wood, so you should be able to apply enough pressure to the pins with just your thumb. You can use a hammer to lightly tap them into place if you need to, but be careful not to damage the wood.
Step 5 – Add seashells and other decorations
If you think these are overkill or look too Kitschy, I guess you're already done. But I wanted to add the shells because I collected most of them on fun days out (or my sister brought them back from holiday) and I wanted the outside of the box to remind me of the fun times as much as the inside.
First, experiment with arranging the shells on the lid without glue. When you're happy, take a photo to use as a guide. When you're ready, add a fairly big blob of PVA in the rough shape of your shell arrangement. Add the shells to the glue and then quickly sprinkle a liberal amount of sand over the glue and shells. Wait for the glue to set and you're all done!
The Canadian dime is a coin my Canadian friend and housemate brought back from visiting her family and because it has an image of the famous fishing / racing schooner Bluenose, it fitted the theme well. It looks pretty cool, too. I also glued this to the chest with PVA.
It's not perfect, I made mistakes and I'm sure a more creative and crafty person could do better, but over all I'm very happy with how this little project turned out. Anyway, I hope you find this guide useful. TTFN.
+--+--+--+--+--+--+--+--+--+--+--+--+--+--+